If you work in IT support or at an MSP, Active Directory is something you deal with every single day. But unless you have a spare Windows Server license and a test environment lying around, it’s hard to actually practice — or break things safely. That’s where your homelab comes in.
In this guide I’ll walk you through setting up a Windows Server 2022 VM in Proxmox and promoting it to a functioning Domain Controller. No production systems at risk. No expensive licenses needed to get started.
This is Part 1 of a two-part series. Part 2 covers AD User Management for sysadmins and helpdesk staff.
What you’ll need
- A Proxmox host (this guide assumes Proxmox VE 8.x)
- The Windows Server 2022 Evaluation ISO (free, 180-day trial — more on this below)
- About 50GB of free storage on your Proxmox node
- 4GB RAM to allocate to the VM (2GB works, 4GB is more comfortable)
That’s it. No license purchase needed for a lab environment.
Step 1: Get the Windows Server 2022 ISO
Microsoft offers fully functional evaluation editions of Windows Server, free for 180 days. No credit card, just an email address.
Head to the Microsoft Evaluation Center and download the ISO version of Windows Server 2022. Make sure you grab the Desktop Experience edition — that gives you the full GUI, which you’ll need for Server Manager and ADUC.
The ISO is around 5GB, so give it a few minutes.
After 180 days, the evaluation will shut down every hour unless activated. For a permanent lab, you can either renew the eval or look into MSDN/Visual Studio subscription licenses if you have access to one.
Step 2: Upload the ISO to Proxmox
Once downloaded, log into your Proxmox web UI and upload the ISO to your local storage.
Navigate to Datacenter → your node → local (or your ISO storage) → ISO Images → Upload.

Wait for the upload to complete before moving on.
Step 3: Create the VM
Click Create VM in the top-right corner of Proxmox. Work through the wizard with these settings:
General tab
- Name:
win-dc01(or whatever makes sense in your lab)
OS tab
- ISO Image: select the Windows Server 2022 ISO you just uploaded
- Guest OS Type: Microsoft Windows
- Version: 11/2022/2025
System tab
- Machine: q35
- BIOS: OVMF (UEFI) — recommended for Windows Server 2022
- Add EFI Disk: yes (Proxmox will prompt you)
- Add TPM: optional for a lab, but doesn’t hurt
Disks tab
- Bus: VirtIO SCSI (best performance)
- Disk size: 60GB minimum (Windows itself takes ~20GB, you want headroom)
CPU tab
- Cores: 2–4 (2 is fine for a DC)
Memory tab
- RAM: 4096 MB (4GB)
Network tab
- Bridge: vmbr0 (or whichever bridge connects to your LAN)
- Model: VirtIO (paravirtualized — better performance than e1000)
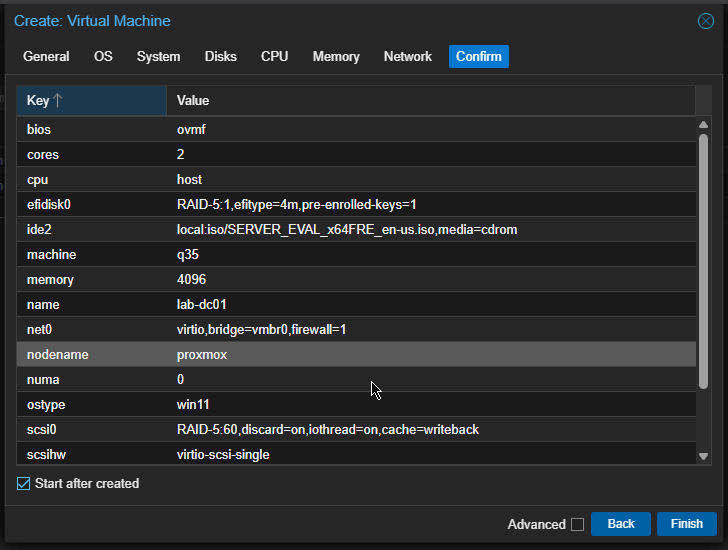
Confirm and create the VM. Don’t start it yet.
Step 4: Add the VirtIO drivers ISO
Windows doesn’t include VirtIO drivers out of the box, so if you’re using VirtIO disk and network (recommended), you need to attach the VirtIO ISO as a second CD drive during installation.
Download the latest virtio-win ISO from the Fedora People repository.
Upload it to Proxmox the same way you uploaded the Windows ISO, then:
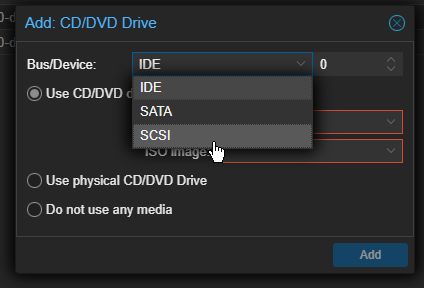
- Select your VM → Hardware → Add → CD/DVD Drive
- Select the virtio-win ISO
Now you’re ready to boot.
Step 5: Install Windows Server 2022
Start the VM and open the console in Proxmox. The Windows installer will boot. Work through it:
- Language, time, keyboard — set to your preference
- Install now
- Select Windows Server 2022 Standard Evaluation (Desktop Experience) — the one with the GUI
- Accept the license
- Choose Custom: Install Windows only
- You’ll see no drives listed at this point — this is normal with VirtIO
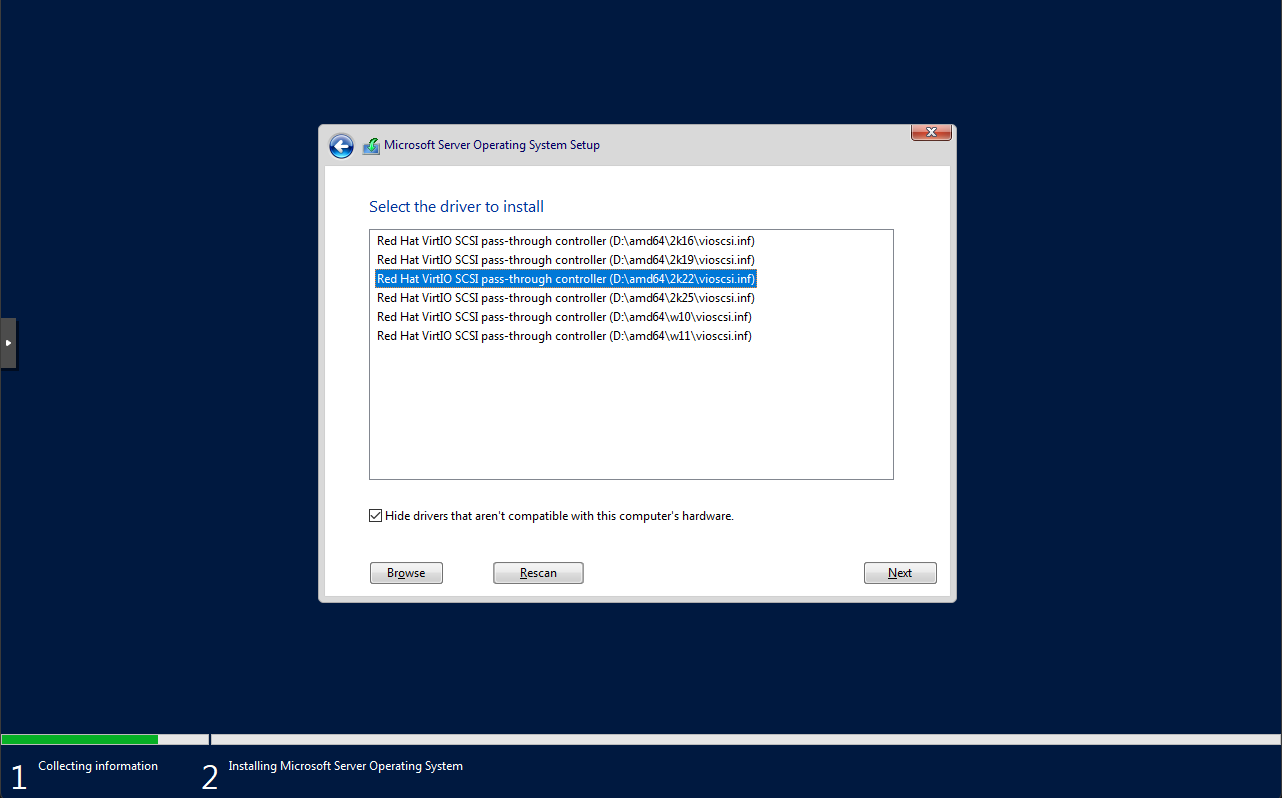
Loading the VirtIO storage driver:
Click Load driver → Browse and navigate to the VirtIO CD drive. Go to vioscsi\2k22\amd64 and select the driver. Your disk should appear. Select it and continue.
Step 6: Initial Windows setup
After installation completes, you’ll be prompted to set an Administrator password. Make it strong — this will become your domain’s default Administrator account.
Log in, and you’ll land on the Server Manager dashboard.
Before doing anything else, install the VirtIO network driver so you have internet access:
Open Device Manager (right-click Start → Device Manager). You’ll likely see an unknown Ethernet controller. Right-click it → Update driver → Browse → point it to the VirtIO CD → NetKVM\2k22\amd64. Apply.
Now set a static IP on the server. Domain Controllers should never use DHCP for their own address.
Open Network and Sharing Center → Change adapter settings → right-click your NIC → Properties → IPv4:
- IP: something static in your LAN range (e.g.
192.168.1.10) - Subnet:
255.255.255.0 - Gateway: your router’s IP
- Preferred DNS:
127.0.0.1(the DC will be its own DNS server once promoted)

Also rename the server before promoting it. Go to Settings → System → About → Rename this PC. Use something like DC01. A reboot is required.
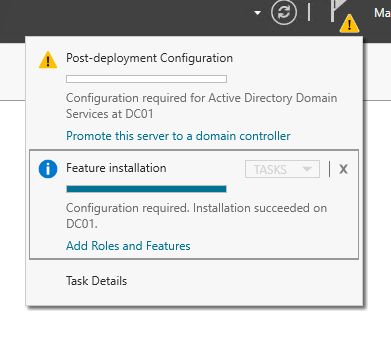
Step 7: Promote the server to a Domain Controller
Open Server Manager → Manage → Add Roles and Features.
Work through the wizard:
- Role-based installation
- Select your local server
- Check Active Directory Domain Services
- Accept the additional features it prompts for
- Click through to install

In the promotion wizard:
- Select Add a new forest
- Root domain name: use something like
lab.localorcorp.internal— avoid using a real public TLD - Forest/Domain functional level: Windows Server 2016 (safe default)
- Check DNS Server (leave it checked)
- Set the DSRM password — this is your emergency recovery password if AD breaks, store it somewhere safe
- Let the NetBIOS name auto-populate (e.g.
LAB) - Leave paths at defaults
- Review and install
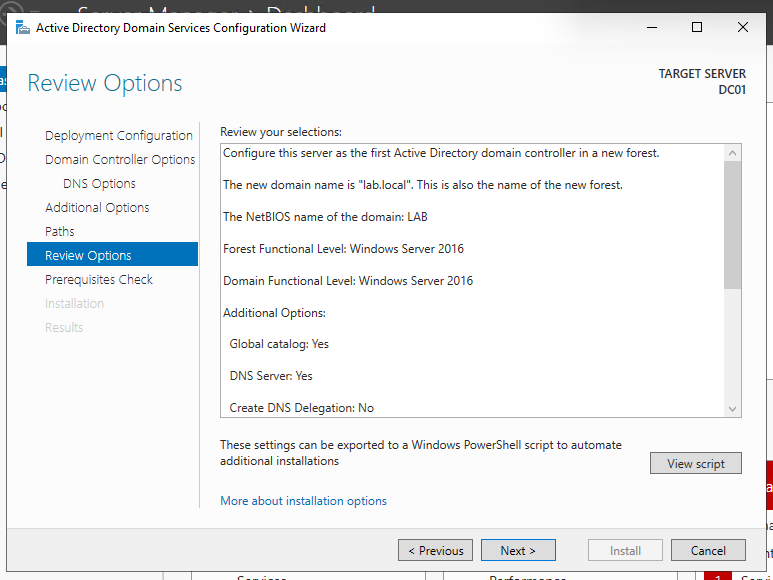
The server will automatically reboot. When it comes back up, you’ll log in as LAB\Administrator (or whatever your domain name is).
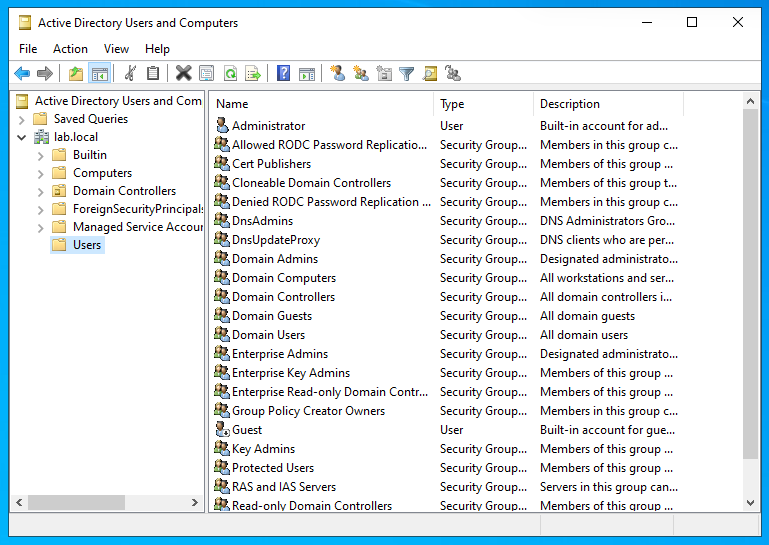
Step 8: Verify everything is working
Open Server Manager → Tools → Active Directory Users and Computers (ADUC).
You should see your domain in the left pane with the default OUs: Builtin, Computers, Domain Controllers, Users.
Also verify DNS is working:
Open a command prompt and run:
nslookup lab.local
It should resolve to your DC’s IP. If it does, you’re good.
What’s next
You now have a fully functional Domain Controller running in your Proxmox homelab. In Part 2 we’ll cover the day-to-day AD tasks every helpdesk tech and sysadmin should know: creating users, managing groups, resetting passwords, delegating control, and more.
If you want to join another machine to this domain for testing, point its DNS to your DC’s IP and use Settings → Accounts → Access work or school → Connect → Join this device to a local Active Directory domain.
Running into issues during promotion? Drop a comment below — the most common gotcha is DNS misconfiguration, which usually means the server’s own DNS wasn’t set to 127.0.0.1 before promotion.